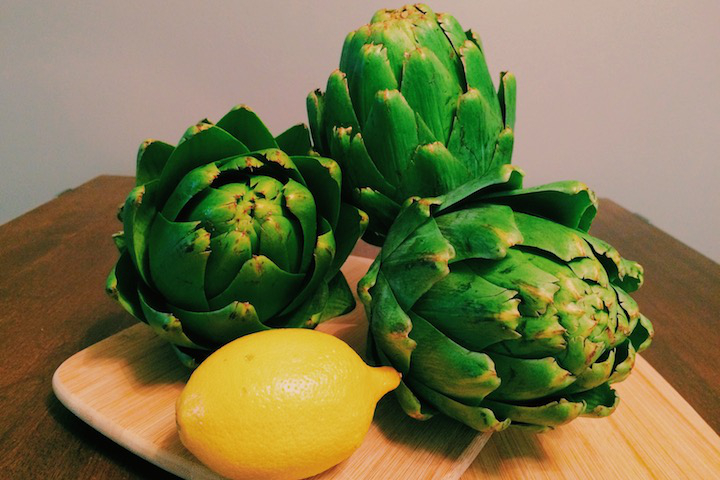
About a month ago I made the choice to be healthier with my cooking and use the freshest possible ingredients. This has actually been much easier than I thought it might be with the exception of last night. I was cooking a dish that required artichokes and, a bit farther into it than I’d like to admit, I realized that I didn’t know how to prep one for cooking. I grew up in a midwestern family that loved their vegetables, however, those vegetables were almost always frozen or came from a can. Needless to say, my education on this topic was nonexistent. Looking online I found a plethora of different ways to cook them to be eaten alone, but as far as getting them ready for another dish there was basically nothing. So, whatever your story may be, should you need instructions on how to prep an artichoke to be used in a dish, I have put some together for you.
How to Prep an Artichoke for a Dish
1. Choosing an artichoke:
-Gently squeeze your artichoke. You’re looking for firmness and heft.
-Rub the leaves against one another. They should squeak, indicating a proper amount of moisture.
-Make sure a bottom leaf snaps off when bent if it’s rubbery it may be old.
-Choose one that has closed petals. An artichoke is a flower bud. You don’t want one too close to the blooming stage. (Mine were a bit more open than ideal, but they were still delicious.)
2. Rinse your artichoke in cold water to get any grit out from between the petals.
3. With a sharp knife, cut off about 1″ from the top of the artichoke. If you don’t have a knife sharp enough you can use a serrated one.

Optional: With a pair of kitchen scissors, cut off the brown, pointed tips from the petals. The idea is to make handling easier.

4. Pull off bottom leaves from the stem and peel. You either keep the stem attached or cut it off first. Either way, be sure to keep it as it contains a lot of meat.

Optional: Artichoke hearts oxidize incredibly quickly. If you want them to keep their fresh color, simply rub with a cut lemon as you cut and expose new areas.
5. Finally getting to the heart. Start by cutting away the top 2/3rds of the artichoke. I peeled away a few of the outer leaves to make it a bit easier.

6. (Interchangeable with #7) Peel away the outer petals from around the heart. Once you’ve peeled away a good amount, cut the rest off with a knife.

7. (Interchangeable with #6) Remove the choke with a spoon or a melon baller. This is the fuzzy part in the very center of the plant. Be sure to take the purple petals out as well. Some people choose to cut the artichoke in half before scooping out the center. Should you decide this is the way for you, it would be best to keep the steps in the order they are in.

8. Your final step is just to trim up anything that you may have left behind in the process, everything you have should be generally soft (as opposed to tough like the outer leaves), and either white or a very pale green color.
You’re all finished! Below is a picture of the yield that you can expect from the cutting down of three artichokes.

Note: As I went, I had a bowl full of cold water and the juice from one lemon waiting to the side. This helped to keep the color of each part as I finished with it, add a bit of flavor, and do a final rinsing in the case of the choke.
No Comments